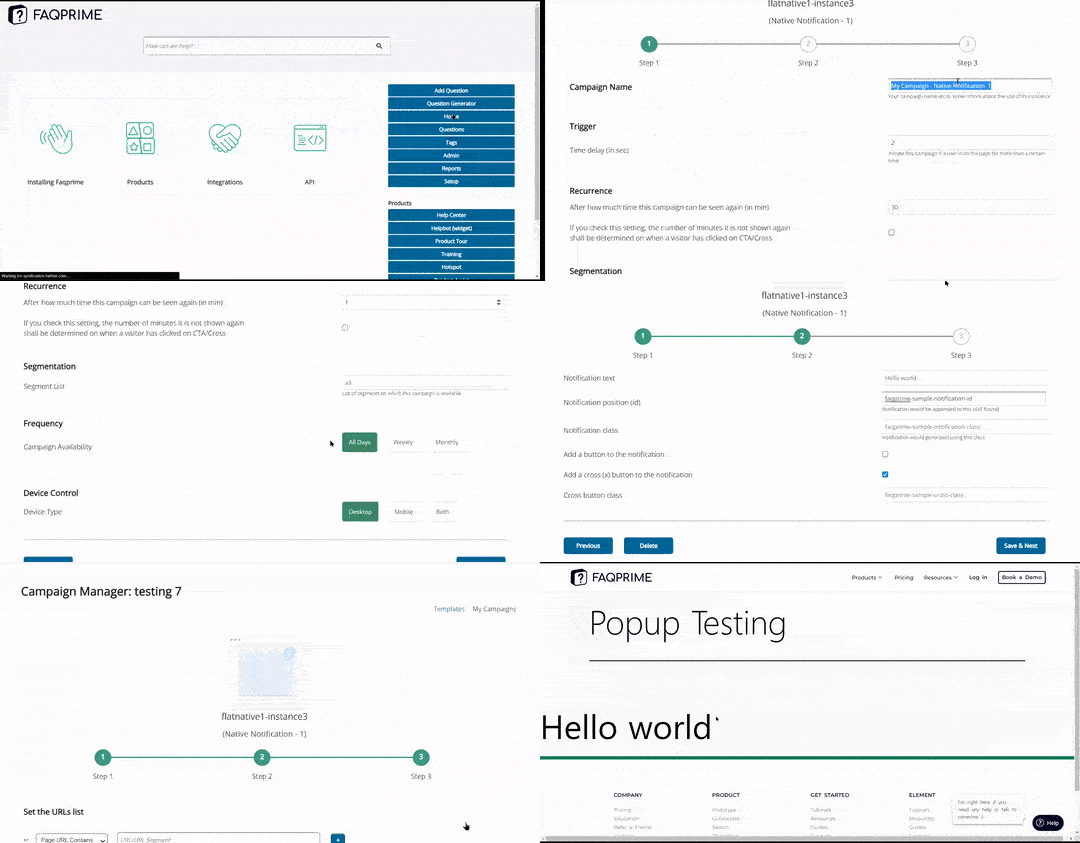
A native notification popup is a great way to integrate notifications with your existing system.
Here’s a step-by-step guide on how to set up a Native Notification popup:
Navigate to the Popup Manager: You can find this in the right navigation menu of your Faqprime dashboard.
Select the ‘Flat Native Notification-1’ Template: This template is designed to create a popup containing a web frame, which allows you to embed an external webpage within your popup.
Copy the Template to the Campaign Manager: The Campaign Manager is where you’ll set up the details of your campaign. Copying your template here allows you to customize it according to your needs.
Set Up Your Campaign: Here, you’ll need to specify the following:
- Campaign Name: This helps you identify your popup.
- Trigger Time: This sets how long a user needs to be on the page before the campaign starts.
- Recurrence: This sets how often the campaign can be seen again (in minutes).
- Segmentation List: This is the list of segments to whom this campaign is available.
- Frequency: This determines how often the campaign is available (daily/ weekly/ monthly).
Configure the Device Type and Location: Here, you’ll need to specify:
- Device Type: Choose which devices will display the campaign (Desktop/ Mobile/ Both).
- Location: Decide where the popup will appear on the screen.
Set the Notification Details: In this step, you’ll need to:
- Enter the notification text that you want to display.
- Select the position where you want the notification to appear by entering the notification ID. The notification will be appended to this ID (if found).
- Enter the Notification class and the CSS class for style. The notification will be generated using this class.
- Optionally, you can choose to add a button to the notification and set the target link.
Choose Your URLs: Make a list of URLs where this popup will appear. These should be the pages on your website where you want the popup to be displayed.
Finalize Your Popup: In the last step, decide where the popup should be displayed. The template has to be set to ‘Active’ to work.
Optional - Use the API for This Popup: If you want to further customize the behavior of the popup using your own scripts, you can find the API key at the bottom of the last page.
Save Your Changes: Click on ‘Save’ to finalize your setup.
And that’s it! Your native notification popup is now live.
