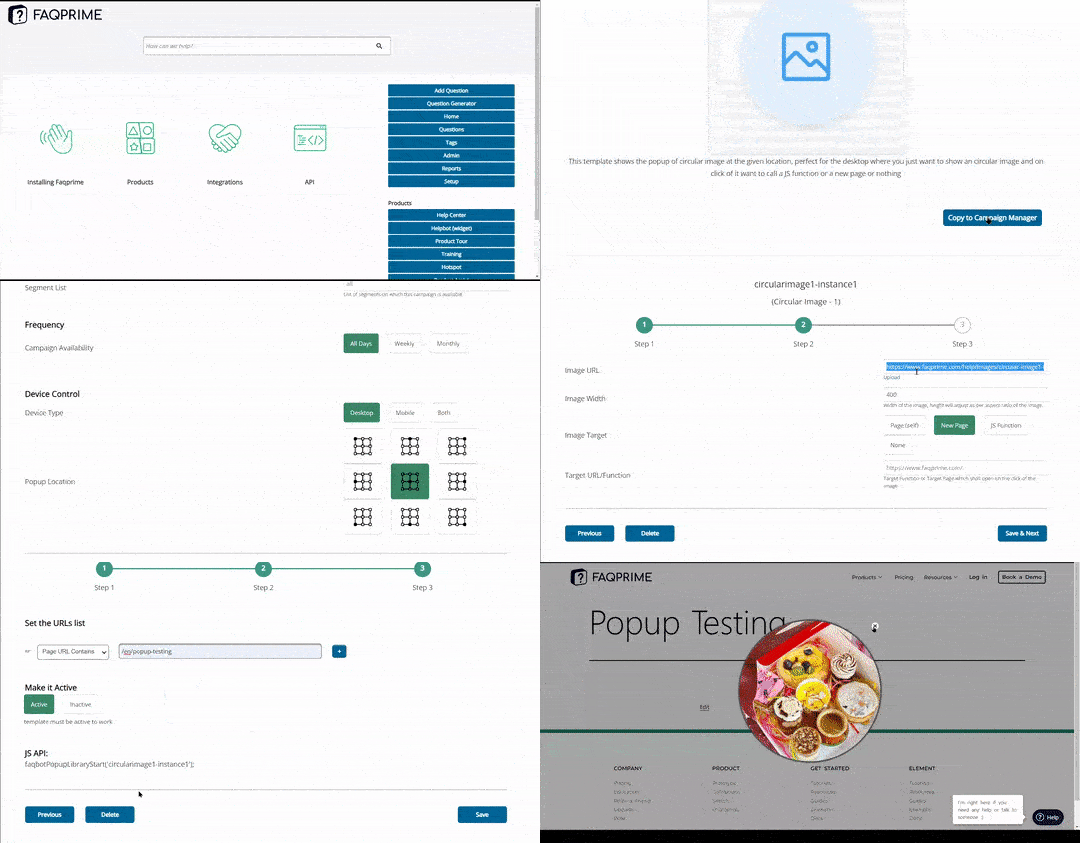
Using a Circular Popup to create a visually appealing popup that stands out on your website, perfect for announcing new products or features.
Steps to create a popup with a circular image:
Start by navigating to the Popup Manager: You can find this in the right navigation menu.
Choose your template: Look for ‘Circular Image - 1’, for a circular Image popup.
Copy your template to the Campaign Manager: This is where you’ll set up the details of your campaign.
Set up your campaign: You’ll need to fill in a few details:
- Campaign Name: This helps you identify your popup.
- Trigger Time: This sets how long a user needs to be on the page before the campaign starts.
- Recurrence: This sets how often the campaign can be seen again (in minutes).
- Segmentation List: This is the list of segments where this campaign is available.
Customize your popup: You can set the following:
- Frequency: How often the campaign is available (daily/ weekly/ monthly).
- Device Type: Which devices will display the campaign (Desktop/ Mobile/ Both).
- Location: Where the popup will appear on the screen.
Upload your image: You can choose a new image from your computer or select one from your media library.
Set your image dimensions: Once you set the width, the height will update automatically
Choose your image target: You can choose between Page (self), New Page, or None.
Page(self)- open the target URL in the same window.
New Page- open the target URL in a new window
None- doesn't redirect to any URL, and can be closed by clicking on x on top of the popup.
Set your target: This is the function or page that will open when the image is clicked. The target URL is the page that will open.
Choose your URLs: Make a list of URLs where this popup will appear.
Finalize your popup: In the last step, decide where the popup should be displayed. Remember, the template is set to 'Active' to work.
If you want to use the API for this popup, you can find the key at the bottom of the last page.
Click ‘Save’ and you’re all set!
