Adding Hotspot is a great way to show contextual information in the helpbot without losing your user's focus.
You can add Hotspot to your site or product wherever you like. Hotspots icons could consist of the small question mark, red circle with pulsating effect and many more options.
You can add Hotspots via one of two methods
Hotspot Studio (Point-and-Click) - No coding required. Below is a quick step-by-step guide to help you through the whole process of adding a hotspot.
1. Head over to Faqprime App and log in.
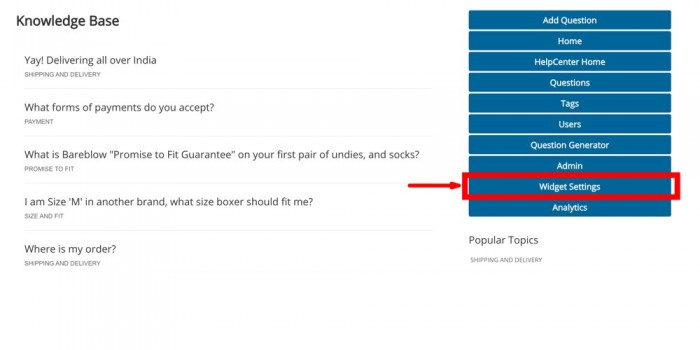
2. Find the 'Hotspot Studio' tab and click to open the page
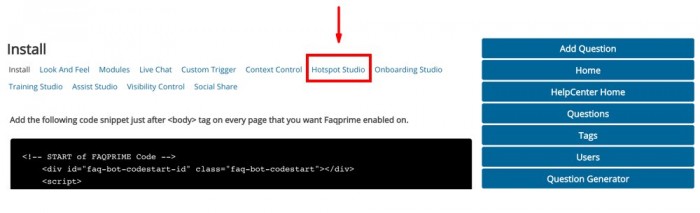
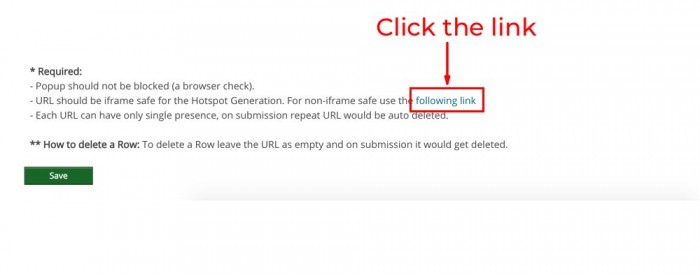
3. Shopify store owners need to find and click on the non-iframe supported Hotspot studio link
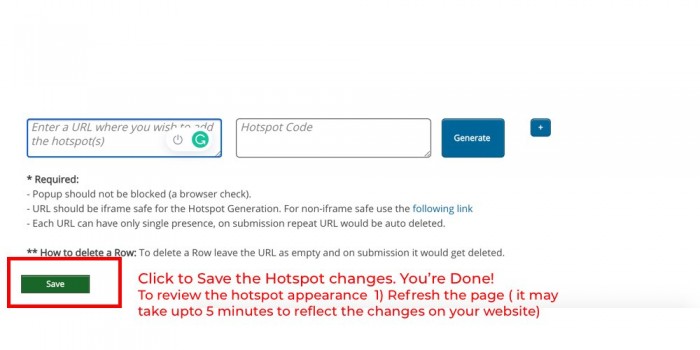
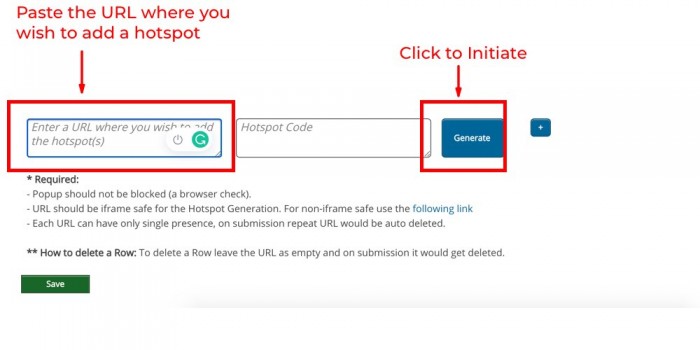
4. Paste the URL where you wish to add the hotspot and then click 'generate' to initiate the process.
Important: Please ensure that your browser's popup blocker is disabled. If it is enabled then please disable the popup blocker and click 'generate' again.
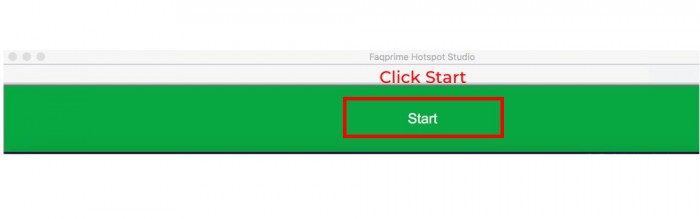
5. Upon clicking 'generate' Two windows shall popup 1) the 'Start' button and 2) The website/page that you'd pasted in the earlier step. To initiate the hotspot addition click 'Start'.
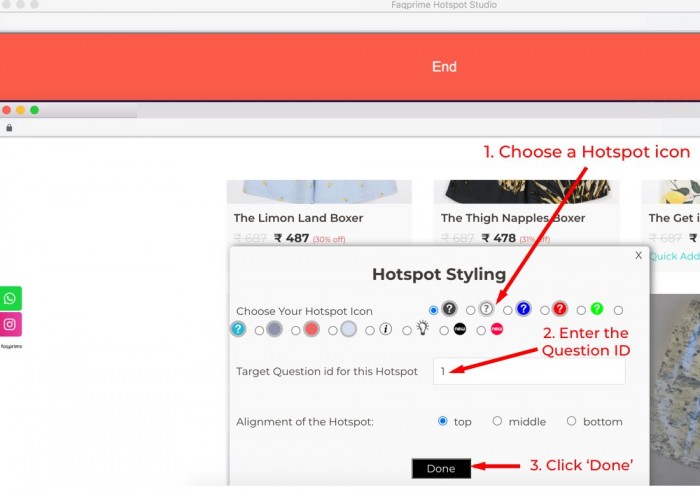
6. Upon clicking 'Start'. Point and click on the element where you wish to add the Hotspot. Upon clicking the element the hotspot styling modal shall appear. In order to effect changes to your Hotspot styling 1) Choose the Hotspot icon 2) Enter the question Id 3) Choose the vertical alignment of the hotspot icon (optional) 4) Click Done.
Important: Please click only once per element to avoid repetition of Hotspots on the same element. Once you're done please click 'End' and you shall be redirected back to the Hotspot Studio landing page.
7. Upon clicking the 'End' button. You shall be sent back to the Hotspot Studio. Where you can click 'save' to submit all the changes.